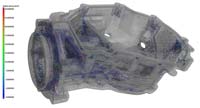
Josh Schradin, one of the 3D Scanning specialists at our Cincinnati location, recently completed a CT Scanning project involving an aluminum casting measuring approximately 12” x 6” x 6” and weighing 10 to 15 pounds.
Our Metrology Grade scanner is equipped to “look inside” aluminum to a wall thickness or total amount of material of 6 to 7 inches; steel to a wall thickness or total amount of material of one inch.

For this particular job, the client was interested in wall thickness inspection as well as porosity and void analysis. The blue paint you’ll see in some of the images was applied by the customer to indicate stress areas where leaking or breaking was suspected. Josh’s scans [he did three stacked scans, each taking only about one half hour, to capture the entire casting] show the voids [legitimate holes] and highlight the most serious problem areas in red-to-pink shades.

Image created from Volume Graphics Software.
Besides offering up the only method to get 3D views of the inside of a part, another primary benefit of CT Scanning is it’s the only way to obtain true dimensional data non-destructively [without cutting up or destroying the object].
The work piece [casting] was rotated 360 degrees in the x-ray beam’s path with multiple readings from various angles being taken. Once the CT grey scale images were converted into voxel-based 3D point clouds Josh was able to generate a CAD-to-Part comparison for the customer.
If you have need Internal Defect Analysis/3D Quantitative Porosity Analysis, Materials Structure Analysis or Assembly Control, CT Scanning [Industrial x ray] is the process and Exact Metrology is the place.


