3D Scanning Services and Equipment

866.722.2600
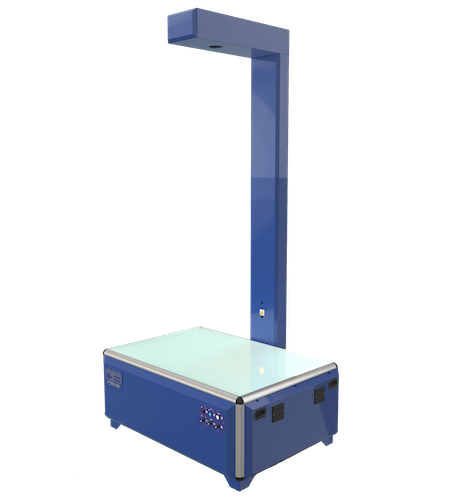
InspecVision Planar – High Speed Integrated 2D & 3D Measurement System

InspecVision Planar – High Speed Integrated 2D & 3D Measurement System

Planar is a 2D inspection machine that allows manufacturers to simply and quickly verify product quality by performing 2D inspection, CAD comparisons & reverse engineering in seconds.

2d measuring systems

Applications

  • Flat and folded/formed sheet metal components
  • Gaskets and seals
  • Laminations
  • O-Rings
  • Paper acetate and electronic drawings
  • Other opaque and semi-transparent flat materials

2D Reverse Engineering

2D reverse engineering is a standard feature with every Planar system. Existing parts can be reverse engineered in seconds creating dxf or dwg CAD files. The software allows the user to edit and clean the data such as standardisation of hole sizes and clean edges and eliminates the need for hand measurement and CAD programming.

There is no comparable system on the market today which can offer this capability with such speed and ease of use

Physical parts or even paper, acetate or electronic image files can be reverse engineered to create CAD files. Reverse engineering processes can also be carried out in 3D using the optional 3D modules

Planar Model Accuracy (micron)
Shape** Height**
Max Component Size (mm)
LXDXH
Max Component Weight (kg)
P17.12 12/25μm* 100 500 X 333 X 120 100
P50.20 20/40μm* 100 884 X 589 X150 100
P70.20 20/40μm* 100 1000 X 667 X 350 50
P110.25 25/50μm* 100 1276 X 851 X 350 200
P150.35 35/70μm* 100 1500 X 1000 X 350 250
P220.35 35/70μm* 100 1830 X 1220 X 350 400
P220.50 50/100μm* 100 1830 X 1220 X 350 400
P360.35L 35/70μm* 100 3000 X 1220 X 350 500
P360.50L 50/100μm* 100 3000 X 1220 X 350 500
P370.50 50/100μm* 100 2355 X 1570 X 350 500
P370.100 100/200μm* 100 2355 X 1570 X 350 500

*The first accuracy value specifies the accuracy achieved over most of the table, the second accuracy value specifies the accuracy achieved at table edges
**Accuracy results are verified on standard production machines using tests based on ISO 10360

Download Brochure


Speed, Accuracy & Reliability

Planar can take up to 40 million measurements in 0.1 seconds. This makes the Planar system the fastest in the world for both inspection and reverse engineering of flat parts. Large range of available models and accuracies available. ISO 10360 guaranteed accuracy. No moving parts to wear or fail. Vibration and scratch proof operation.


Download Brochure

Request Quote


2d inspection

2d metrology

​Benefits

  • World’s fastest 2D inspection and reverse engineering system
  • Fully automated one click inspection
  • Machine sizes range from 500mm to 3000mm
  • Accuracy from 12 microns
  • No moving parts
  • Scratch resistant
  • Designed for shop floor use
  • Simple calibration and minimal maintenance
  • Minimal training required
  • Easily retrofitted with full 3D scanning
  • Rapid return on investment

Exact Metrology Inc. sells, services and supports the products promoted on this website. Many or most are copyrighted, registered or trademarked to their respective manufacturers who have granted Exact Metrology Inc. license to represent.


\